

Trip.com Booking Confirmation: How to Check and Manage Your Booking

By Trip.com
June 26, 2026

After booking a flight, hotel, or travel product on Trip.com, your booking confirmation becomes your most important travel document. For many Filipino travelers, this simple file gives peace of mind because it shows that everything is confirmed and ready. It includes your travel details, payment, and reservation info, so you can travel confidently without worrying about surprises.
What Is a Trip.com Booking Confirmation?

Trip.com User
A Trip.com booking confirmation is the official proof that your flight, hotel, or travel activity is successfully booked. For many Filipino travelers, this is the first thing to check after payment because it shows that everything is confirmed and ready for the trip. You can save it on your phone or print a copy to show at the airport or hotel if needed.
Booking Detail | Description |
|---|---|
Booking Reference Number | Your unique booking ID. You will use this when checking in online or contacting support. |
Traveler Details | Full names and contact details of all passengers. Make sure it matches your passport. |
Travel Dates and Times | Shows your flight schedule, hotel check in dates, or activity time. Always double check before travel. |
Payment Details and Total Cost | Shows how much you paid, payment method, and any taxes or fees included. |
Cancellation or Change Policies | Explains the rules if you need to change or cancel your booking and any possible fees. |
Why It’s Important
Your booking confirmation proves that your reservation is valid and confirmed. Many Filipino travelers keep a copy on their phone or email because you may need to show it during different parts of your trip. Having it ready helps avoid stress and delays.
Situation | Why the Booking Confirmation Is Needed |
|---|---|
Checking in at the airport | Serves as proof of your flight booking and helps you complete check in smoothly. |
Confirming your hotel reservation | Allows the hotel to verify your booking and room details, especially during busy dates. |
Requesting refunds or changes | Trip.com needs your booking reference to process cancellations, refunds, or changes. |
Contacting Trip.com customer support | Sharing your booking details helps support teams find your reservation and assist you faster. |
How to Access Your Booking Confirmation
Getting your Trip.com booking confirmation is simple. Most Filipino travelers check it right after booking to make sure everything is correct and saved for travel.
Via Email Confirmation
Step 1: Check the email you used when booking on Trip.com.
Step 2: Look for the confirmation email sent after payment.
Step 3: Open the email to see your full booking details and e-ticket.
Step 4: Download or screenshot a copy so you can easily show it at the airport or hotel.
Via Trip.com Website
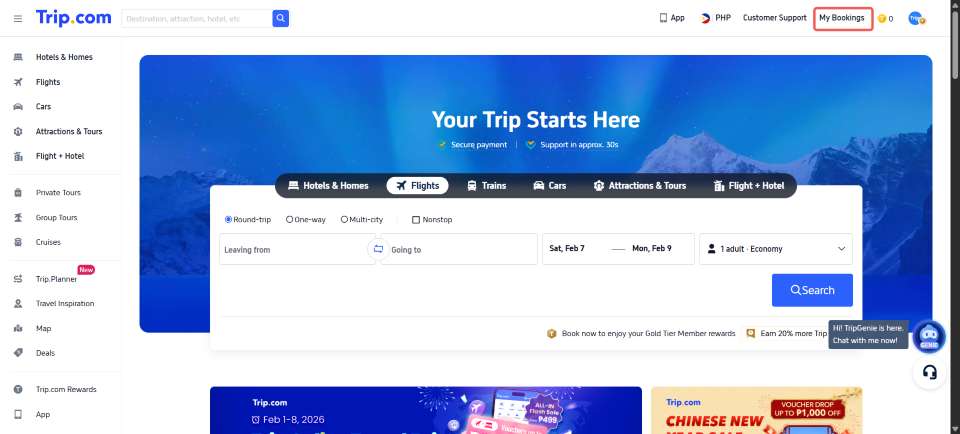
Step 1: Log in to your Trip.com account.
Step 2: Click My Bookings and choose the booking you want to check.
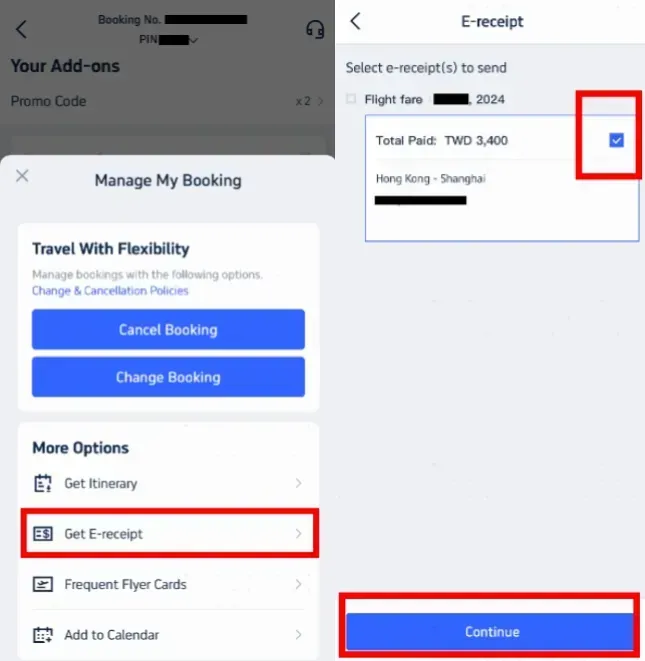
Step 3: Go to Manage My Booking.
Step 4: Look for the e-receipt option under More Options.
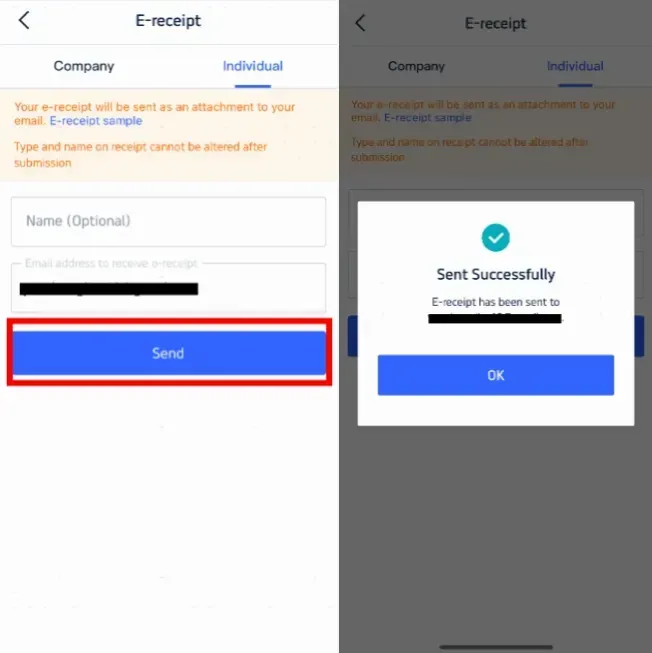
Step 5: Send the e-receipt to your email or download it if the option is available.
Note: Button names may look slightly different depending on your device, region, or Trip.com page version.
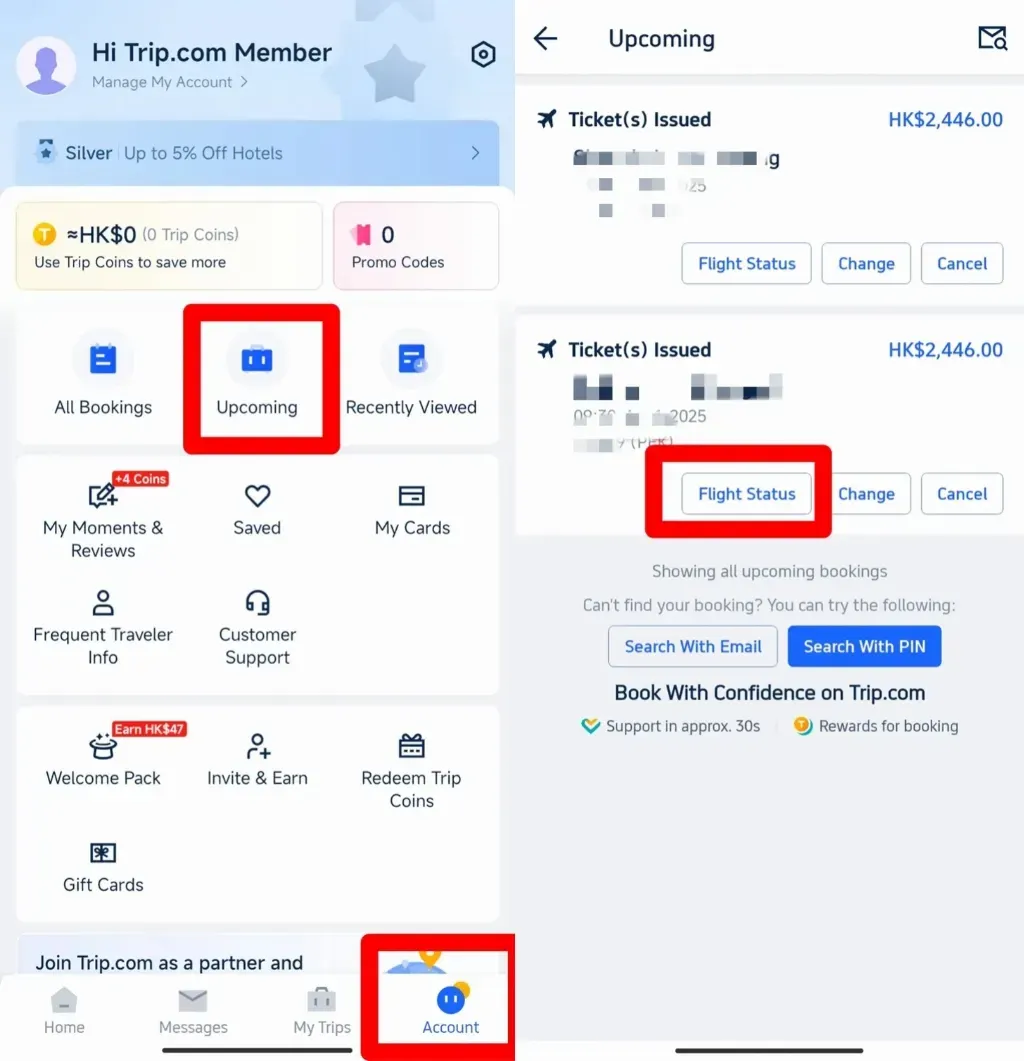
Via Trip.com App
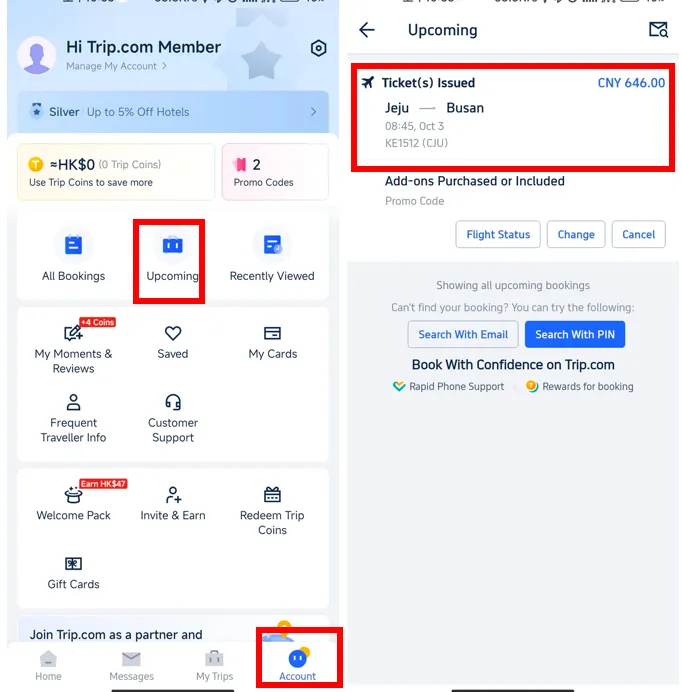
Step 1: Open the Trip.com app on your phone.
Step 2: Tap “Account” and go to your bookings.
Step 3: Select your upcoming reservation.
Step 4: View your booking confirmation and save a copy for easy access during your trip.
How Long Does It Take to Get a Trip.com E-Receipt?
Most of the time, Trip.com will send your booking confirmation or ticket update by email after payment is completed. For flights, ticket availability is usually updated within 15 minutes during 06:00 to 23:25 GMT+8, but some bookings may take longer depending on the airline, payment status, or ticket issuance process.
If you do not receive your confirmation right away, check your spam or junk folder first. You can also log in to your Trip.com account, go to My Bookings, and check your booking status there.
How to Book an Airline Ticket on Trip.com
Booking a flight on Trip.com is simple and easy to follow. Many Filipino travelers use the app or website to compare prices and confirm tickets in just a few steps.
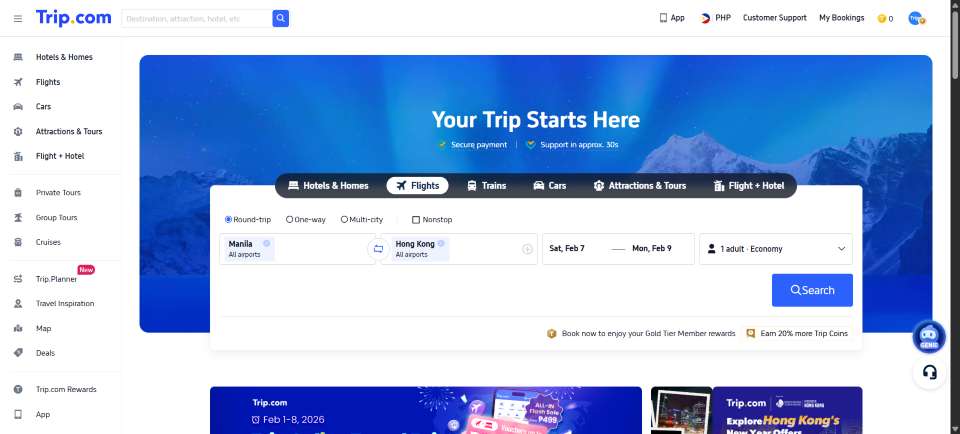
Step 1: Search for Flights
- Choose if you want a one way or round trip ticket.
- Type your departure city, destination, and travel dates.
- Enter the number of passengers and travel class.
- Tap search to see available flights and prices.
- Compare options and choose the flight that fits your budget and schedule.
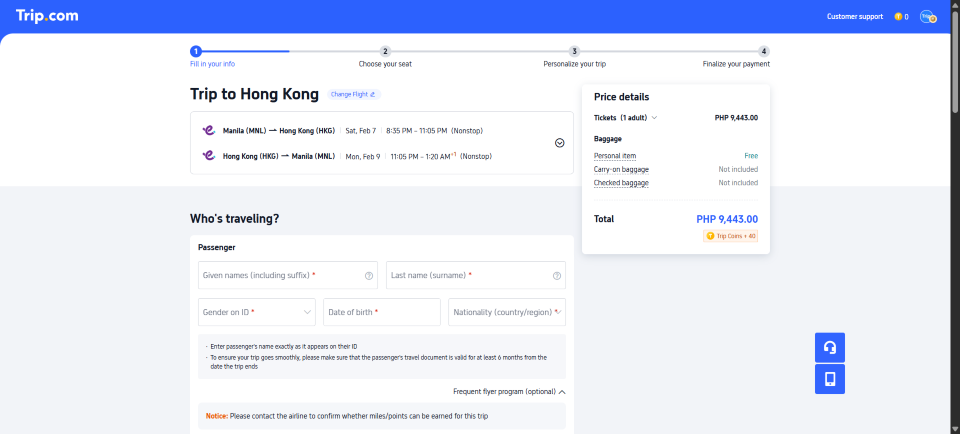
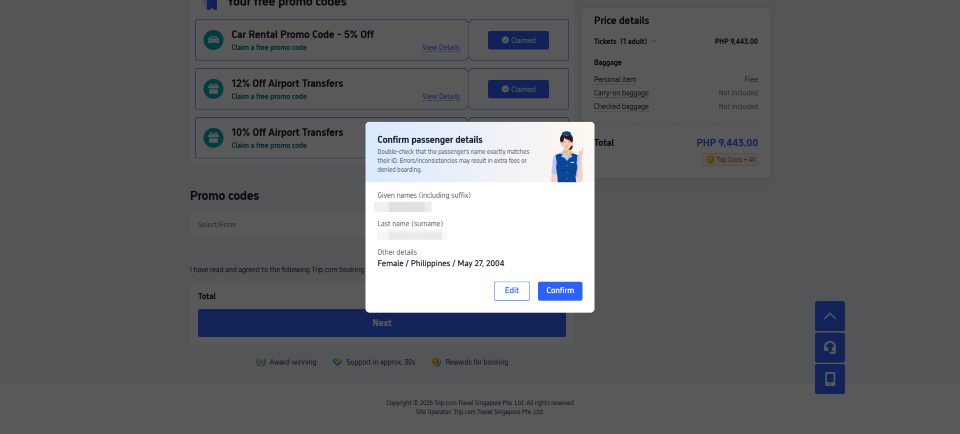
Step 2: Enter and Confirm Passenger Details
- Select your preferred flight and price option.
- Enter passenger names exactly as shown on the passport.
- Add baggage if needed by selecting checked baggage options.
- Review all details carefully before moving to the next step.
- Make sure the spelling of names and travel dates are correct.
Step 3: Make Payment
Click the Pay button to go to the payment page.
Choose your preferred payment method.
Complete the payment and wait for confirmation.
Payment options may vary depending on your location and booking.
Step 4: Receive Your E-Ticket
Once payment is successful and the ticket is issued, Trip.com will send your airline ticket confirmation by email.
Save a copy on your phone or print it for airport check in.
You can also view your ticket anytime through the Trip.com app or website.
FAQs About Trip.com Booking Confirmation
-
When will I receive my Trip.com booking confirmation?
-
Do I need to print my booking confirmation?
-
What should I do if I did not receive my confirmation email?
-
Can I show my booking confirmation on my phone?
-
Why is my name on the confirmation important?
Trending Searches
-
Popular Content
-
Top Flight Links
-
Popular Hotels
-
Popular Things to Do
-
Featured guides
-
Trip.com links
- Trip.com E-Ticket
- Trip.com Payment Methods
- Trip.com Passport Change
- Trip.com Customer Service
- Trip.com Flight Cancellation
- Trip.com VIP Lounge Access
- Trip.com Phone Number
- Trip.com Check In
- Payment Sale
- Trip Coins
- Trip.com Hotel Refund
- Trip.com Cancellation Policy
- Trip.com Ticket Issued Status
- Trip.com Flight Ticket
- Trip.com Membership
- Trip.com E-Receipt
- Trip.com Seat Selection
- Trip.com Baggage Allowance
- Trip.com Flight Change
- Trip.com Reviews
- Cheap tickets from Bacolod to Manila
- Cheap tickets from Manila to Singapore
- Cheap tickets from Kuala Lumpur to Manila
- Cheap tickets from Manila to Bacolod
- Cheap tickets from Manila to Cebu
- Plane tickets from Manila to Caticlan
- Cheap tickets from Manila to Hong Kong
- Cheap flights from Manila to Bangkok
- PR2149 Flight Status
- TG624 Flight Status
- Z2218 Flight Status
- Z26612 Flight Status
- K6830 Flight Status
- PR2343 Flight Status
- Z21265 Flight Status
- Hotels near SM City Dasmarinas
- Hotels near Paseo Destino
- Hotels near Changbai Mountain Club Med Mediterranean Hot Springs
- Hotels near Ngurah Rai International Airport
- Hotels near Patria De Cebu Inc
- The Seven Clark Condo
- Ibis Hotel (Nantong Tongzhou Bay)
- Crystal Orange Qingdao Golden Beach
- Panglao Regents Park Resort
- City Suites Taoyuan Station
- Hotels in Duren
- Hotels in Tokyo
- Hotels in Hegang
- Hotels in Osaka
- Hotels in Pasig
- ※1-day private charter tour to Xuankong Temple + Yungang Grottoes in Datong
- Philippines 5G eSIM | TikTok & ChatGPT Available | Day Pass/Total Data Package | 24-Hour Billing | 1-30 Days | QR Code
- Explore Guilin with Ease: Premium Private Car Service
- Chengdu Departure - Bipenggou Shuttle Bus
- Ben Thanh Princess Dinner Cruise on Saigon River | Ho Chi Minh city
- Asia & Oceania 4G/5G eSIM | Daily/Total Data Package | 1–30 Days | 24-Hour Billing | QR Code
- Vietnam | 4G/5G eSIM | Daily/Data Plan | 24-hour Billing | 1-30 Days | QR code
- Mainland China/Hong Kong/Macau 5G eSIM | Day Pass/Total Data Package | 24-Hour Billing | QR Code
- Ljubljana: UNESCO-Listed Škocjan Caves and Piran Day Trip
- Panajachel: Lake Atitlan Villages ATV Tour
- From Banff: Affordable Shared Shuttle Bus to Calgary Airport
- Balestrate: Olive Grove Tour with Wines & Olive Oil Tasting
- Armação de Pêra: Jet Ski Experience
- UAE SHJ Sharjah international airport/VIP lounge pass/waiting/transfer/rest
- Trip moments in Gannan