

e-Travel Philippines Guide 2025: Step-by-Step Registration & QR Code Tips


eTravel registration is required for travelers entering the Philippines, including Filipino and foreign passengers and crew members. It is also required for Filipino passengers departing the country. Departing foreign passengers do not need to register. Required travelers must complete it within 72 hours before arrival or departure and present the QR code before boarding.
What is e-Travel Philippines?

eTravel Philippines is an online system by Philippine government agencies that replaces manual arrival and departure cards. It allows required travelers to submit travel and health details before their flight. It is needed for arrivals to the Philippines and departing Filipino passengers, while departing foreign passengers are not required to register.
Who Needs to Register with e-Travel Philippines?
- Filipino passengers entering the Philippines
- Foreign passengers entering the Philippines
- Filipino and foreign crew members entering the Philippines
- Filipino passengers departing the Philippines
This includes Filipino tourists, OFWs, balikbayans, business travelers, and foreign travelers entering the Philippines. Foreign tourists, foreign residents, and other foreign nationals leaving the Philippines do not need to register for departure.
Each required traveler should have their own eTravel registration, including children traveling with family members.
✅ Why it is required:
- Speeds up immigration processing
- Supports public health and emergency response
- Replaces manual arrival and departure cards
- Helps government agencies collect accurate travel information
⚠️ Official exemptions may include:
- Foreign diplomats and their dependents
- Foreign dignitaries and members of their delegation
- 9(e) visa holders
- Holders of diplomatic passports
- Holders of official or service passports
How to Register on e-Travel Philippines
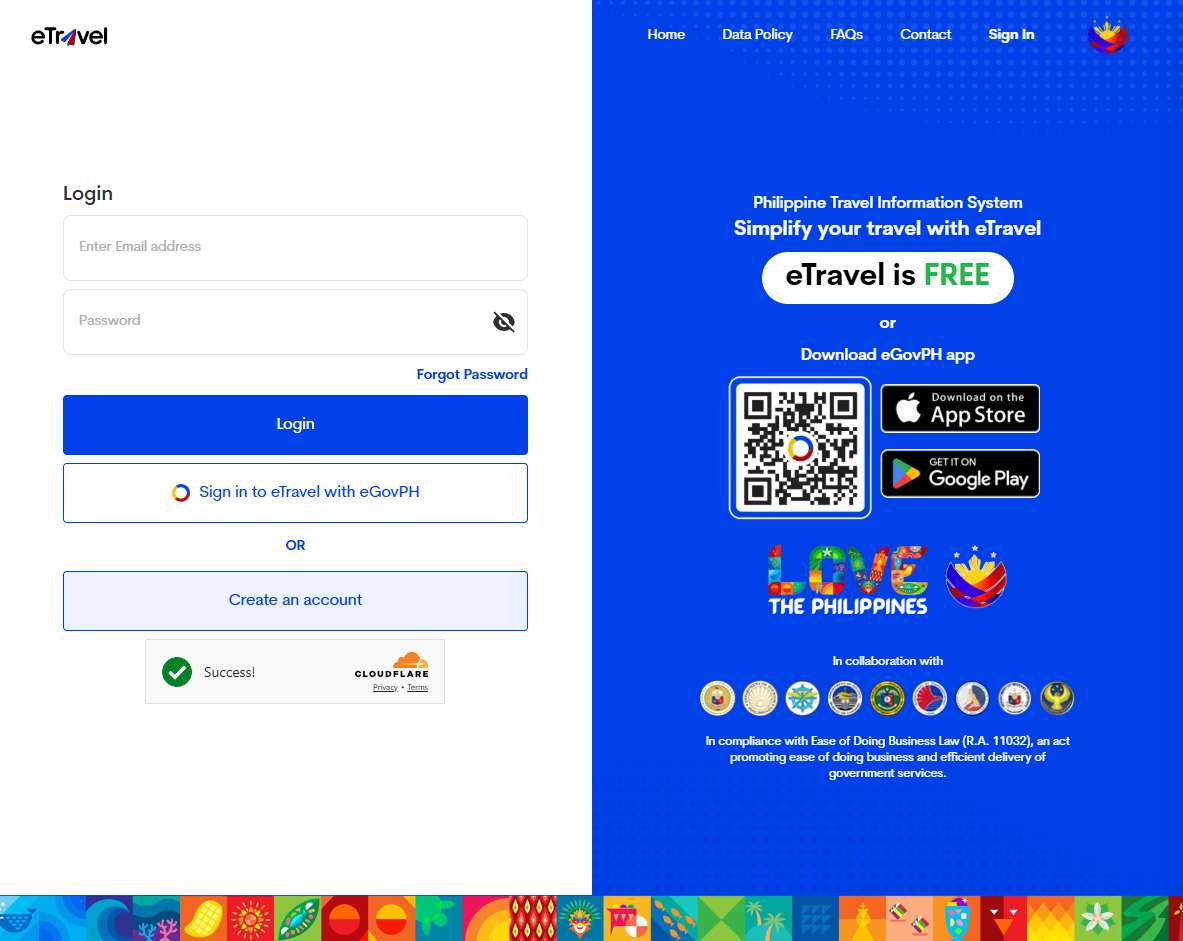
Here is a simple 5-step guide to registering on the eTravel Philippines platform.
Step 1: Go to the Official Site
- Visit https://etravel.gov.ph
- Choose ARRIVAL or DEPARTURE
- Make sure the website ends in .gov.ph to avoid fake or paid websites.
Step 2: Enter Personal Information
Fill in your:
- Full name
- Birthdate
- Gender
- Nationality
- Passport number
- Contact information
Make sure all details match your passport exactly.
Step 3: Fill in Travel Details
Enter your:
- Flight or vessel information
- Port of entry or exit
- Destination or origin country
- Traveler type, such as tourist, OFW, resident, or business traveler
Step 4: Complete Health Declaration
You may be asked to provide health-related details, including current symptoms, recent exposure, and travel history within the required period.
Answer honestly and carefully to avoid issues during airport processing.
Step 5: Submit & Get QR Code
After submitting the form, you will receive an eTravel QR code. Save a screenshot on your phone or print a copy as backup.
Required travelers may be asked to show this QR code before boarding and during airport processing.
eTravel Registration Tips
- Register within 72 hours before your arrival or departure
- Use a valid email address
- Check your spam or junk folder if needed
- Double-check all passport and flight details
- Save your QR code offline
- Bring a printed copy as backup
- Never pay anyone to process your eTravel form because registration is free
Green vs Red QR Code: What Do They Mean?
After submitting your eTravel registration, you may receive a green or red QR code.
🟩 Green QR Code
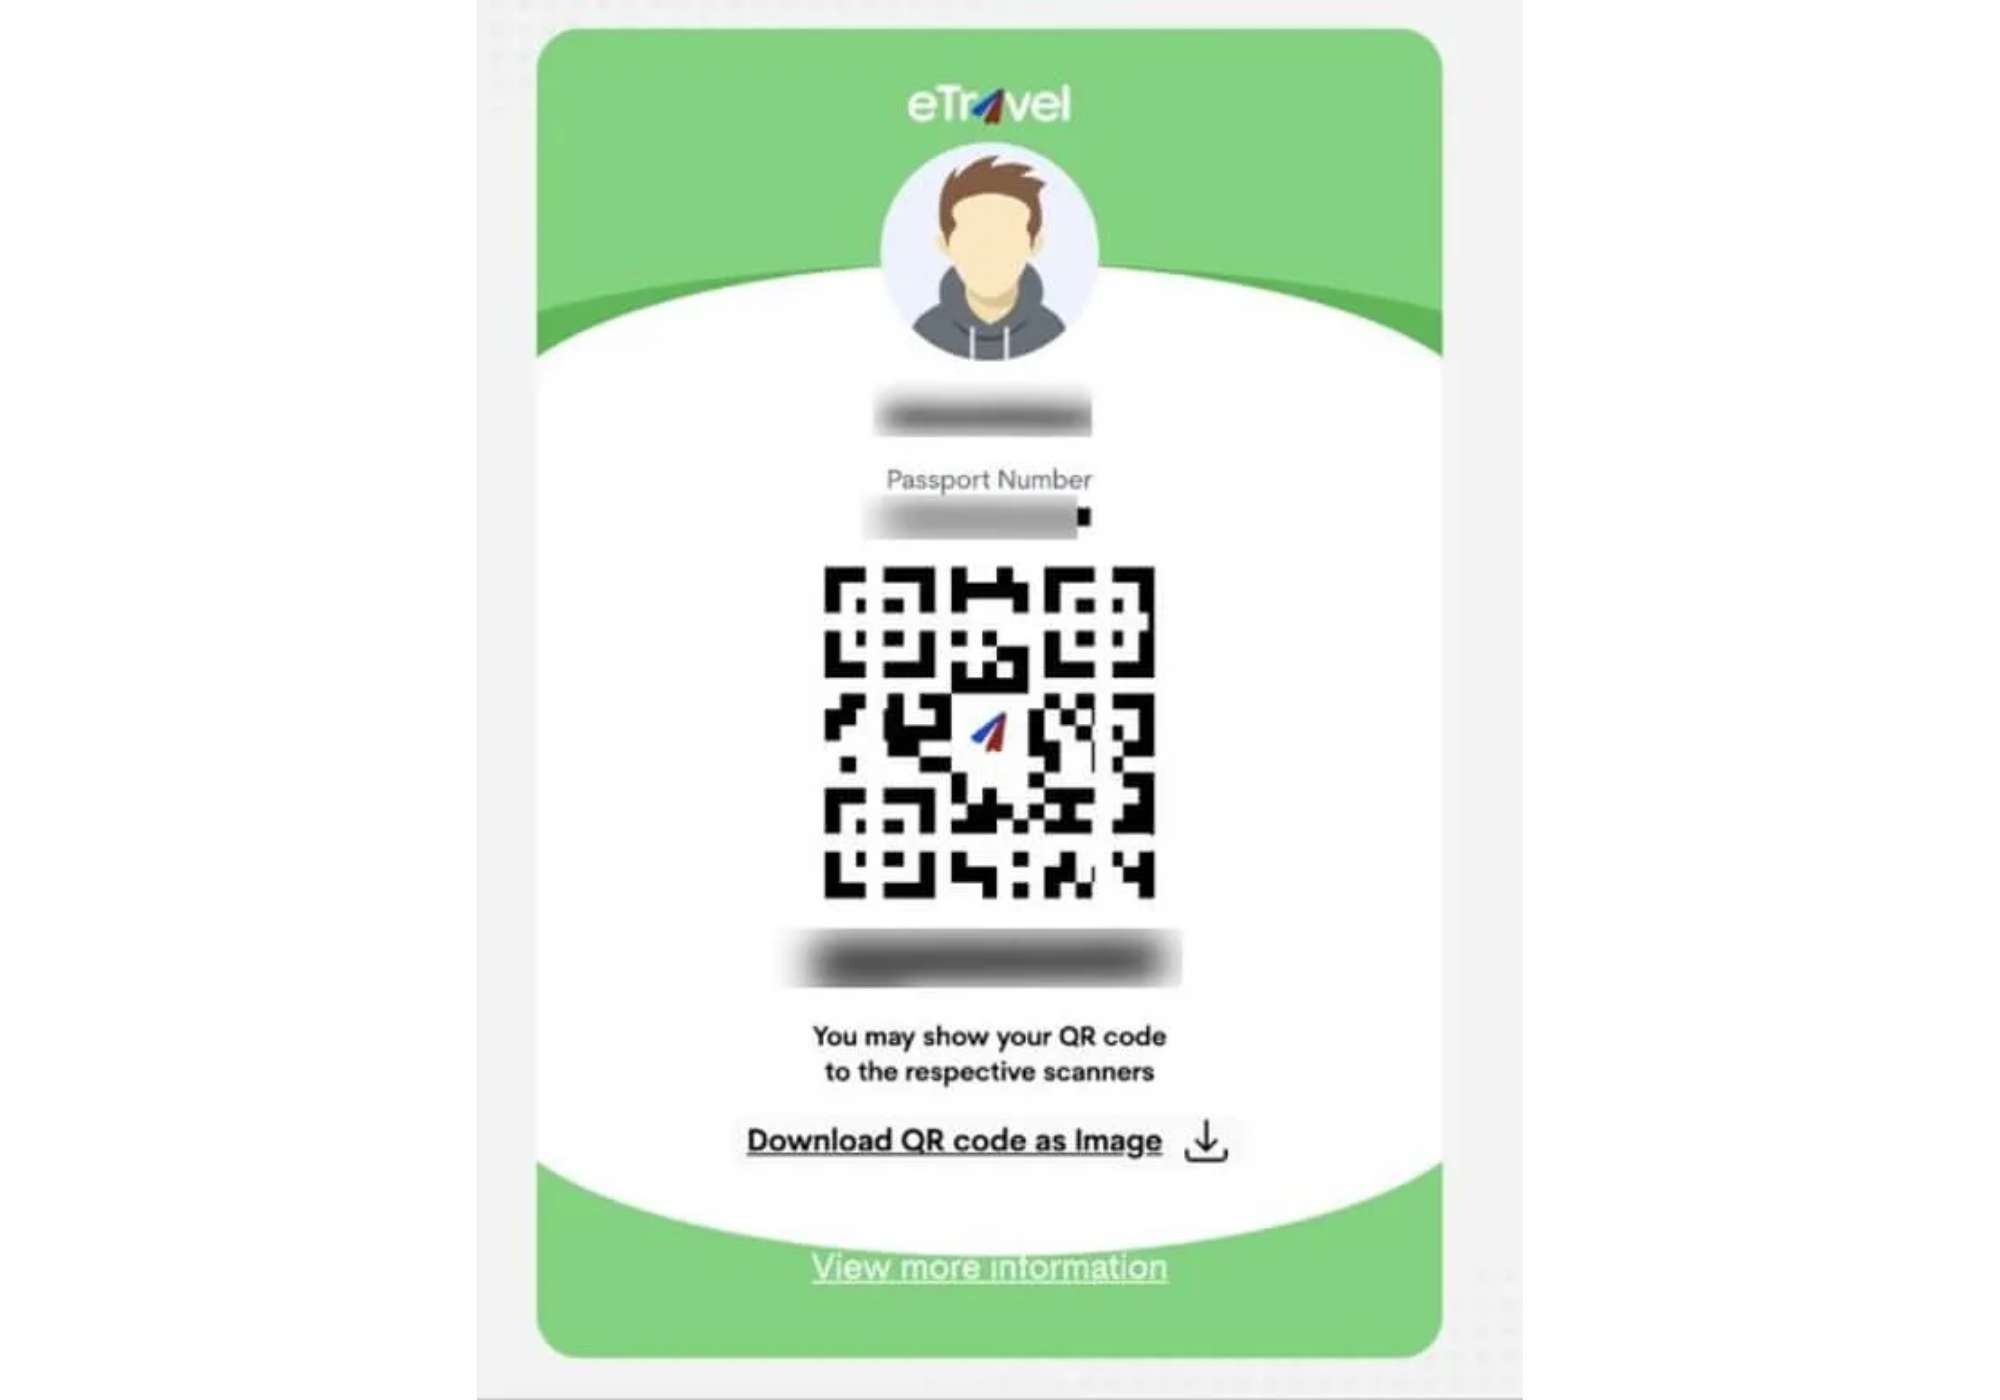
A Green QR Code means your submitted information is complete and proper. Upon arrival, you may proceed directly to immigration inspection.
You may receive a Green QR Code if:
- Your personal and travel information is complete
- Your submitted details are accurate
- You have no health-related flags based on your declaration
🟥 Red QR Code
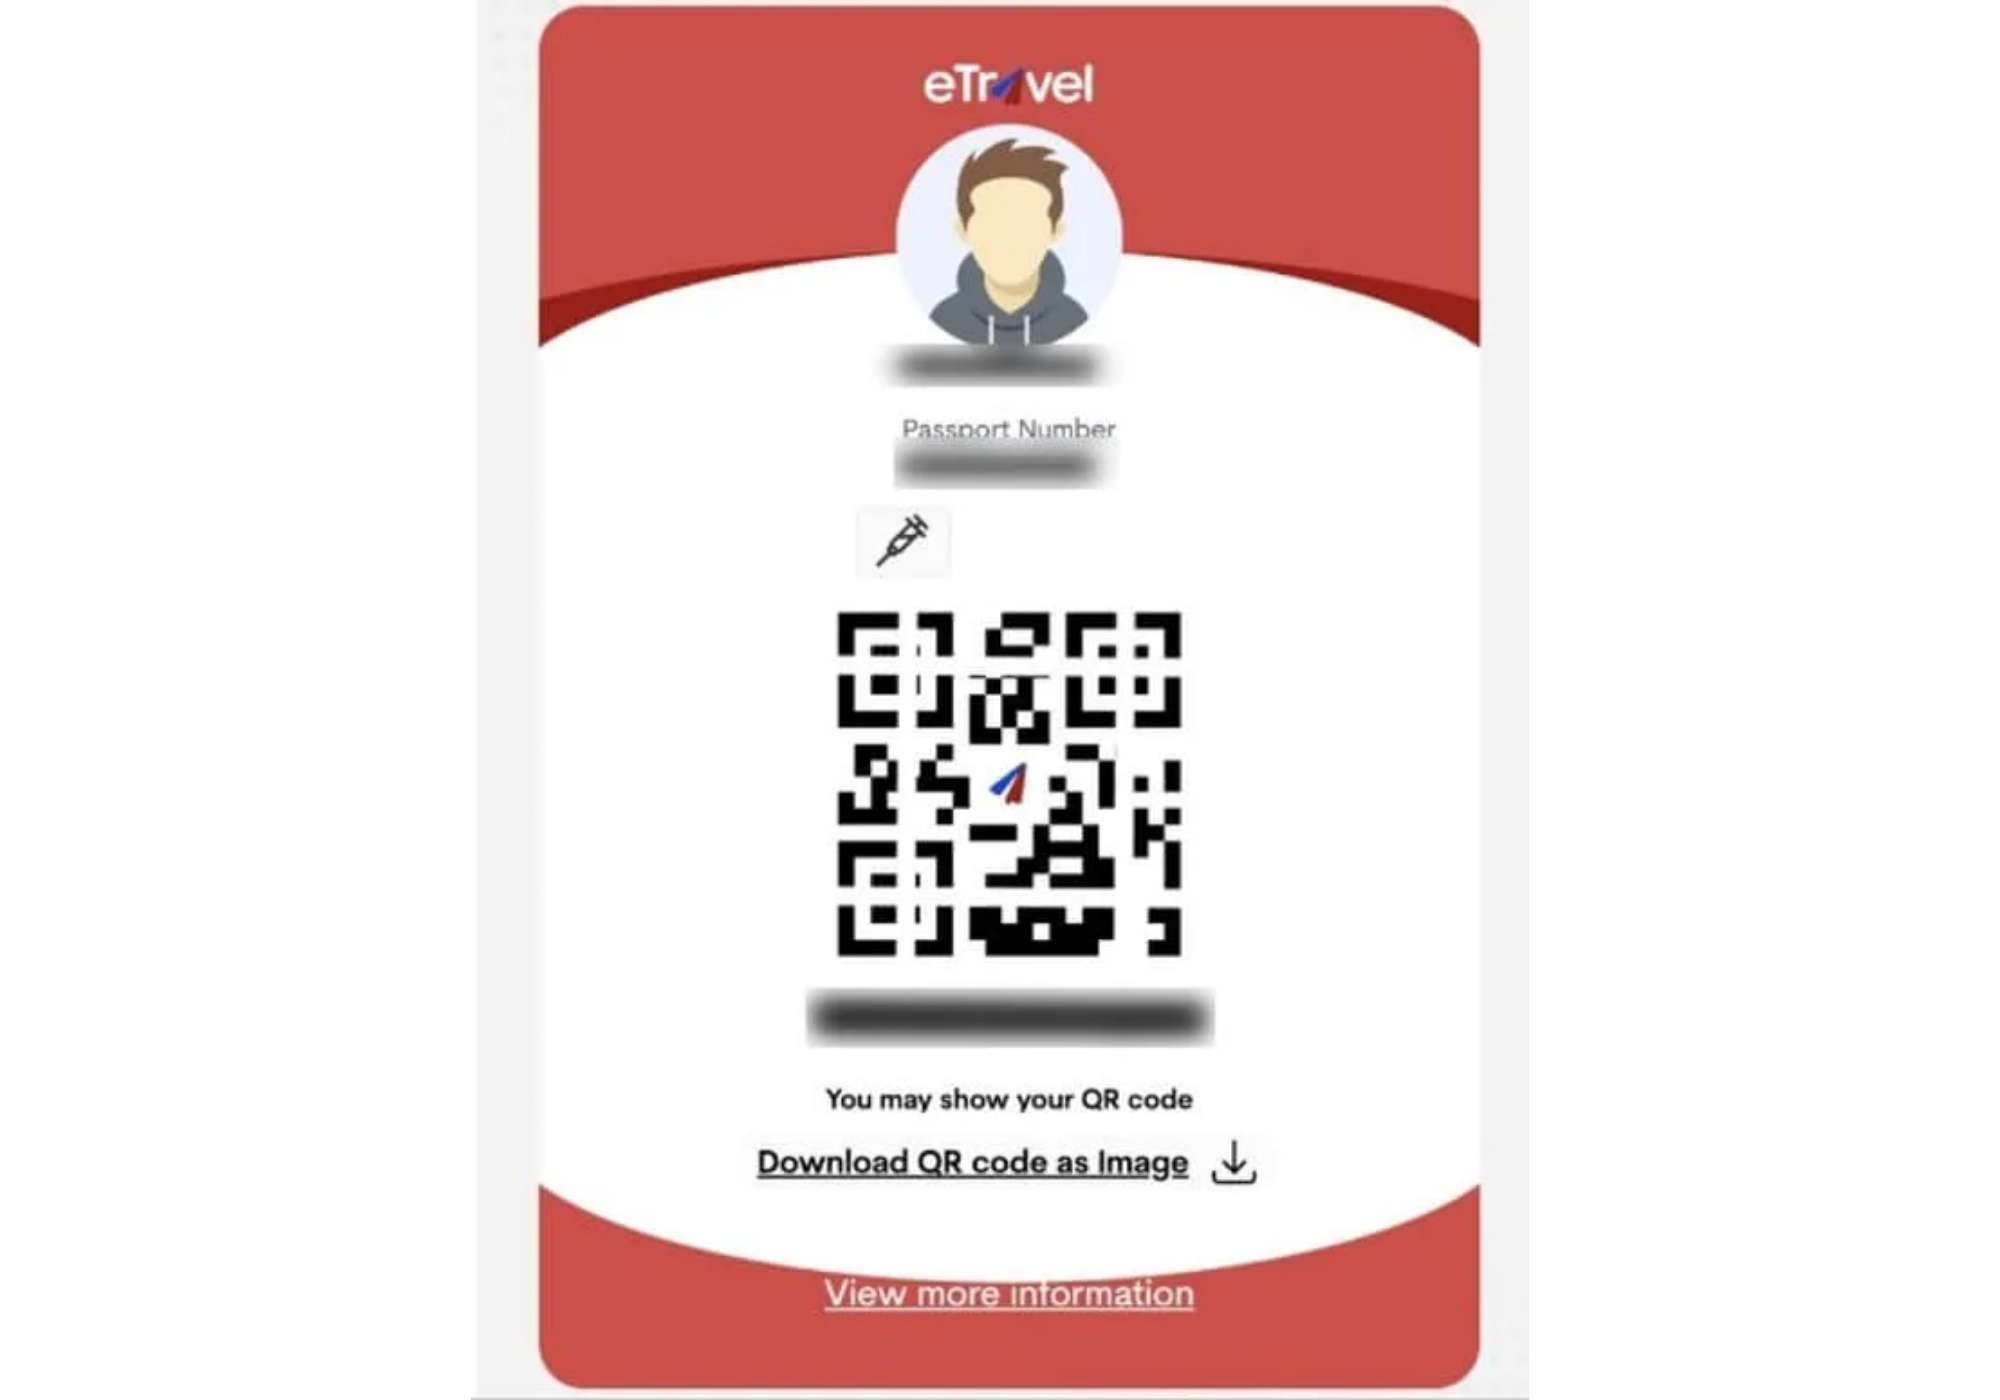
A Red QR Code means your information may be incomplete, incorrect, or flagged due to health-related details. You may need further inspection by the Bureau of Quarantine before immigration processing.
You may receive a Red QR Code if:
- Your submitted information is incomplete or incorrect
- You reported sickness
- You had recent exposure to someone with a communicable or infectious disease within the past 30 days
- Your details need manual review by health or quarantine personnel
What Should You Do If You Get a Red QR Code?
Do not panic. A Red QR Code does not automatically mean you will be denied entry.
You should:
- Arrive early at the airport
- Cooperate with Bureau of Quarantine officers
- Prepare supporting documents if needed
- Answer questions clearly and honestly
A few extra minutes of checking your eTravel form before submitting can help you avoid delays at the airport.
 NO.1
NO.1


Using the e-Travel QR Code at the Airport
Here is how required travelers may use the eTravel QR code when flying to or from the Philippines.
Before Departure
If you are a Filipino passenger leaving the Philippines, show your eTravel QR code when requested by airline or airport staff.
You should also prepare:
- Passport
- Visa, if required
- Flight ticket
- eTravel QR code, digital or printed
Departing foreign passengers are not required to register for eTravel.
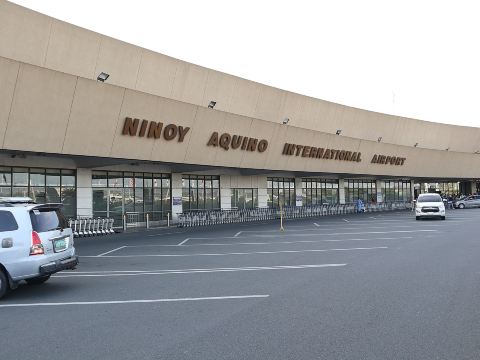
Upon Arrival in the Philippines
All Filipino and foreign passengers entering the Philippines should complete eTravel registration before arrival.
You may need to show your QR code at:
- Airline check-in counter before boarding
- Quarantine or health check area
- Immigration counter
- Customs area, if applicable
Digital vs Printed QR Code
Digital QR Code
A screenshot on your phone is convenient and usually accepted. Make sure it is saved offline and your phone has enough battery.
Printed QR Code
A printed copy is a good backup, especially for seniors, families, or travelers who may have phone or internet issues.
Lost or Forgot Your eTravel QR Code?
If you lost your QR code, go to the official eTravel website and use the Edit Registration or Update Existing Record section.
You will need your:
- Reference number
- Date of birth
Do not use unofficial websites or paid services. eTravel registration is free and should only be done through the official government website.


Useful Tips for Travelers to the Philippines
Before traveling to the Philippines, keep these tips in mind:
- Complete your eTravel registration within 72 hours before your flight.
- Make sure your name, passport number, and travel details match your documents exactly.
- Save your eTravel QR code on your phone and keep a screenshot for offline access.
- Bring a printed copy of your QR code in case your phone battery runs low or your screen cannot be scanned.
- Use only the official eTravel website at etravel.gov.ph.
- Never pay anyone to process your eTravel form because registration is free.
- Charge your phone fully before going to the airport and bring a power bank if possible.
- Arrive at the airport early in case you need extra time for check-in or document checks.
- Check your email, including your spam folder, in case you need to retrieve your registration details.
- If you are entering the Philippines, be ready to show your QR code before boarding and again during airport processing.
FAQs: e-Travel Philippines
-
Is registration mandatory?
-
How much does it cost?
-
When should I register?
-
What if I forget to register before arriving at the airport?
-
Can I update my registration after submitting it?
Trending Searches
-
Featured guides
-
Trip.com links